Experiencing a blinking blue light on your CenturyLink modem can be frustrating, often signaling an internet connectivity issue. This guide dives deep into the common causes and provides actionable solutions to get your service back online quickly. We'll demystify the blinking blue light and empower you to troubleshoot effectively.
Understanding the Blinking Blue Light
The lights on your CenturyLink modem are designed to provide a visual status update on your internet connection and device operation. While solid lights generally indicate a healthy connection, a blinking blue light often signifies a problem. This blinking can occur on different indicators, such as the "Internet," "Online," or "DSL" lights, each pointing to a specific area of concern. Understanding what this blinking means is the first step towards resolving the issue. For instance, a blinking blue "Internet" light typically means the modem is attempting to establish a connection with CenturyLink's network but is failing to do so. Conversely, a blinking blue "DSL" light might indicate a problem with the physical line connecting your home to the CenturyLink network. In 2025, with the increasing reliance on stable internet for remote work, education, and entertainment, understanding these indicators is more crucial than ever. Many users report this issue, and the causes can range from simple power fluctuations to more complex network or equipment failures. This guide aims to cover the most prevalent reasons and provide a structured approach to diagnosis and resolution.
Common Causes of a Blinking Blue Light
Several factors can contribute to your CenturyLink modem displaying a blinking blue light. Identifying the specific cause is key to applying the correct fix. These issues can broadly be categorized into problems with the modem itself, the physical connection, or the CenturyLink network. Understanding these categories helps in systematically diagnosing the problem.
1. Modem or Router Issues
The modem, the device that connects your home to CenturyLink's network, can sometimes be the source of the problem. This could be due to a temporary glitch, overheating, or a more permanent hardware failure. Routers, which distribute the internet signal within your home, can also cause connectivity issues if they are not communicating properly with the modem.
- Temporary Glitch: Like any electronic device, modems can experience temporary software or hardware hiccups. A simple reboot often resolves these.
- Overheating: Modems generate heat. If they are placed in an enclosed space, near heat sources, or if their internal fans are blocked, they can overheat, leading to performance issues and blinking lights.
- Firmware Issues: The modem's firmware is its operating system. Outdated or corrupted firmware can cause connectivity problems. CenturyLink typically pushes updates automatically, but sometimes these can fail or cause conflicts.
- Hardware Malfunction: In some cases, the modem itself may be failing due to age or damage. This is less common but a possibility, especially with older equipment.
2. Physical Connection Problems
The physical cables and connections are the backbone of your internet service. Any disruption here will directly impact your connection. In 2025, with more people relying on high-speed internet, even minor physical issues can be highly disruptive.
- Loose Cables: Ensure all cables (power, Ethernet, and DSL/fiber line) are securely plugged into both the modem and the wall jack. A slightly dislodged cable can cause intermittent or no connection.
- Damaged Cables: Inspect cables for any visible signs of damage, such as cuts, kinks, or frayed wires. Damaged cables can impede signal transmission.
- Faulty Wall Jack: The phone jack or fiber optic port in your wall might be damaged or corroded, preventing a stable connection.
- Splitters or Unnecessary Connections: If you are using DSL, excessive splitters or old wiring can degrade the signal. It's best to connect the modem directly to the primary jack.
3. CenturyLink Network or Service Outages
Sometimes, the issue isn't with your equipment or home wiring but with CenturyLink's network itself. These can be widespread or localized.
- Local Outage: CenturyLink may be experiencing a service outage in your area due to maintenance, equipment failure at their end, or external factors like weather damage to infrastructure.
- Line Issues Beyond Your Home: The problem could lie further up the line, between your home and the CenturyLink central office. This might involve issues with neighborhood wiring or equipment.
- Account Issues: While less common for a blinking blue light, billing issues or service suspensions could theoretically impact connection status lights. However, this usually results in a different indicator.
4. Interference
In some cases, external factors can interfere with the signal reaching your modem, particularly for DSL connections.
- Electrical Interference: Other electronic devices near your modem or phone line can sometimes cause interference, though this is less common with modern equipment.
- Weather Conditions: Severe weather can sometimes affect external network infrastructure, leading to temporary service disruptions.
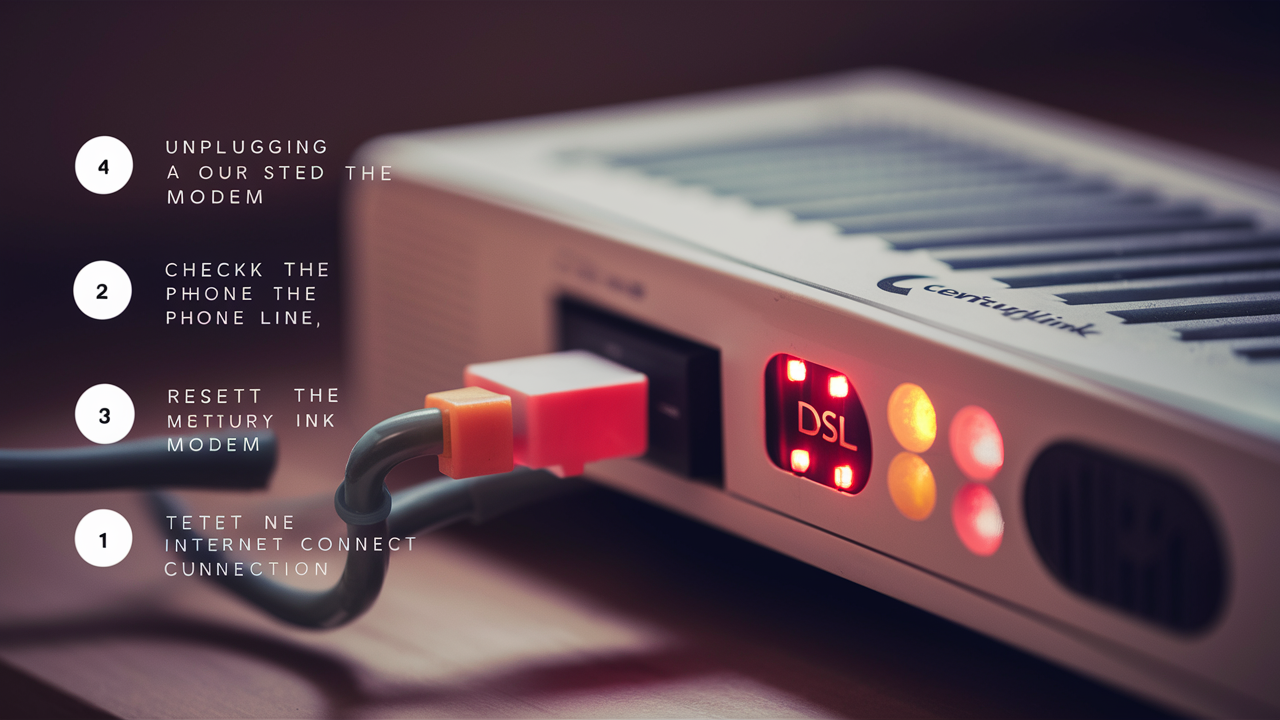
Troubleshooting Steps for a Blinking Blue Light
When you encounter a blinking blue light on your CenturyLink modem, a systematic approach to troubleshooting can help you pinpoint and resolve the issue. These steps are designed to be followed in order, starting with the simplest solutions and progressing to more complex ones. For 2025, these steps remain the most effective way to address common connectivity problems.
Step 1: Power Cycle Your Modem and Router
This is the most common and often most effective first step for resolving temporary glitches. A power cycle, or reboot, forces the modem and router to re-establish their connection with CenturyLink's network.
- Unplug the Power: Disconnect the power adapter from your CenturyLink modem. If you have a separate router, unplug its power adapter as well.
- Wait: Leave both devices unplugged for at least 60 seconds. This allows any residual power to dissipate and the devices to fully reset.
- Plug In Modem: Plug the power adapter back into your CenturyLink modem. Wait for it to fully boot up. This can take several minutes. Observe the lights; you want to see them stabilize, ideally to a solid state.
- Plug In Router (if applicable): Once the modem lights appear stable (or have cycled through their startup sequence), plug the power adapter back into your router. Wait for it to boot up.
- Test Connection: Try connecting to the internet. If the blinking blue light persists, proceed to the next step.
Step 2: Check All Cable Connections
Loose or damaged cables are a frequent culprit for connectivity issues. Ensure all connections are secure and free from visible damage.
- DSL/Fiber Line: Ensure the cable connecting your modem to the wall jack (phone jack for DSL, or fiber optic port) is firmly seated at both ends.
- Ethernet Cables: If you use an Ethernet cable to connect your modem to a router or a computer, ensure it's securely plugged in. Try a different Ethernet cable if you have one.
- Power Cable: Make sure the power adapter is firmly plugged into the modem and the electrical outlet.
Tip: If you have DSL, try to connect the modem directly to the primary wall jack, bypassing any splitters or extension cords, to rule out issues with those components.
Step 3: Inspect the Modem for Damage or Overheating
Physical inspection can reveal obvious problems.
- Visible Damage: Look for any cracks, burns, or other signs of physical damage on the modem casing.
- Overheating: Feel the modem. Is it excessively hot to the touch? Ensure it has adequate ventilation and is not covered or placed in a confined space. If it's hot, unplug it for a while to let it cool down.
Step 4: Test a Direct Connection (if using a separate router)
If you have a separate router connected to your CenturyLink modem, the router itself might be causing the issue or preventing a proper connection. Test by connecting a computer directly to the modem via an Ethernet cable.
- Disconnect your router from the modem.
- Connect a computer directly to the modem using an Ethernet cable.
- Power cycle the modem again.
- Check if the blinking blue light has resolved and if you can access the internet.
If the internet works when connected directly to the modem, the problem likely lies with your router. You may need to reset or replace your router.
Step 5: Check for CenturyLink Service Outages
It's possible the issue is on CenturyLink's end. You can check for outages in your area.
- CenturyLink Website: Visit the official CenturyLink website (centurylink.com) and look for a "Service Status" or "Outage Map" section.
- Customer Support: Call CenturyLink customer support to inquire about known outages in your area.
- Social Media/Community Forums: Sometimes, local community groups or CenturyLink's social media channels will provide updates on widespread issues.
If an outage is confirmed, you will need to wait for CenturyLink to resolve it. This is a common occurrence, especially in 2025 with increased demand on infrastructure.
| Troubleshooting Step | Likely Cause Addressed | Action |
|---|---|---|
| Power Cycle | Temporary modem/router glitch | Unplug, wait 60 seconds, plug back in |
| Check Cables | Loose or damaged physical connections | Ensure all cables are secure and undamaged |
| Inspect Modem | Overheating or physical damage | Check for heat, ensure ventilation |
| Direct Connection Test | Router malfunction | Connect computer directly to modem |
| Check for Outages | CenturyLink network issue | Visit CenturyLink website or call support |
Advanced Troubleshooting and When to Call Support
If the basic troubleshooting steps haven't resolved the blinking blue light on your CenturyLink modem, it's time to consider more advanced diagnostics or reach out to customer support. Some issues require specialized knowledge or tools that only CenturyLink technicians possess. Understanding when to escalate is crucial to avoid unnecessary frustration and wasted time. For 2025, CenturyLink's support channels are equipped to handle a wide range of issues, but preparing yourself with the information gathered from basic steps will expedite the process.
1. Modem Reset to Factory Defaults
A factory reset can resolve persistent software glitches or configuration errors within the modem. This process will erase all custom settings, so you'll need to reconfigure your Wi-Fi network name (SSID) and password afterward.
- Locate the Reset Button: Most modems have a small, recessed reset button on the back or bottom panel. You may need a paperclip or a similar pointed object to press it.
- Press and Hold: With the modem powered on, press and hold the reset button for about 15-30 seconds. The exact duration can vary by model.
- Observe Lights: The modem lights will likely flash or change as it resets.
- Reboot and Reconfigure: Once the modem has restarted, it will boot up with its original factory settings. You will need to access the modem's interface (usually via a web browser using an IP address like 192.168.0.1 or 192.168.1.1) to set up your Wi-Fi network again. Refer to your modem's manual or CenturyLink's support site for specific instructions.
Caution: Only perform a factory reset if you are comfortable reconfiguring your network settings. If unsure, skip this step and contact support.
2. Checking Modem Signal Levels (Advanced Users)
If you have a DSL modem, you might be able to access its diagnostic interface to check signal-to-noise ratio (SNR) and attenuation levels. These metrics can indicate line quality issues that might not be apparent otherwise.
- Access Modem Interface: Log into your modem's web interface.
- Find Diagnostics/Status: Look for a section labeled "Status," "Diagnostics," "DSL Status," or similar.
- Interpret Readings: High attenuation and low SNR typically indicate a poor line quality. Specific acceptable ranges vary, but significantly low SNR (e.g., below 20 dB) or high attenuation (e.g., above 50 dB) can point to line problems.
Note: This is a more technical step. If you are not familiar with these metrics, it's best to leave this to CenturyLink technicians.
3. Testing Different Devices and Locations
To rule out issues with specific devices or their proximity to the modem, try the following:
- Test Multiple Devices: Try connecting different devices (laptops, smartphones, tablets) to your Wi-Fi or via Ethernet to see if the problem is isolated to one device.
- Test Wi-Fi Range: If the issue is intermittent, try moving a device closer to the router/modem to see if signal strength is a factor.
When to Call CenturyLink Support
If you've gone through the basic troubleshooting steps and the blinking blue light persists, it's time to contact CenturyLink support. Here's when you should definitely call:
- After Power Cycling and Cable Checks: If the problem remains after the initial reboot and cable inspection, it's likely beyond simple user fixes.
- If a Service Outage is NOT Confirmed: If you can't find any information about a local outage, the issue might be specific to your line or equipment.
- After Performing a Factory Reset (and it didn't help): This suggests a deeper hardware or network problem.
- If You Suspect Line Issues: If you've noticed frequent internet drops, slow speeds, or static on your phone line (for DSL), it could indicate a problem with the physical line outside your home.
- If Your Modem is Old or Damaged: If your modem is several years old or shows signs of physical damage, it might be nearing the end of its lifespan.
What to Tell Support: When you call CenturyLink, be prepared to provide them with the following information:
- Your account number and service address.
- A clear description of the problem, including which light is blinking blue and whether it's constant or intermittent.
- The troubleshooting steps you have already taken (e.g., power cycle, cable check, direct connection test).
- The make and model of your modem.
This information will help the support representative diagnose the issue more efficiently. In 2025, CenturyLink aims to resolve most issues remotely, but they may need to schedule a technician visit if the problem cannot be fixed over the phone.
Preventative Measures and Optimizing Your Connection
Proactive maintenance and smart usage habits can significantly reduce the likelihood of encountering issues like a blinking blue light on your CenturyLink modem. By implementing these strategies, you can ensure a more stable and reliable internet connection. In 2025, with internet being a critical utility, these preventative measures are more important than ever.
1. Proper Modem Placement and Ventilation
The physical environment of your modem plays a crucial role in its performance and longevity.
- Open Area: Place your modem in an open, well-ventilated area. Avoid placing it inside cabinets, behind furniture, or in enclosed spaces that can trap heat.
- Away from Heat Sources: Keep the modem away from direct sunlight, radiators, or other heat-generating appliances.
- Stable Surface: Ensure the modem is placed on a stable surface where it won't be easily knocked over or have its vents blocked.
2. Regular Reboots
While not always necessary, a scheduled reboot can prevent minor glitches from escalating.
- Weekly Reboot: Consider scheduling a weekly reboot of your modem and router. You can do this manually or, if your router has the feature, set up an automated reboot schedule. This is akin to restarting your computer to clear temporary memory and processes.
3. Cable Management and Inspection
Keeping your cables in good condition is vital for signal integrity.
- Secure Connections: Periodically check that all cables are securely plugged in.
- Avoid Bending/Kinking: Do not bend or kink cables sharply, as this can damage the internal wires. Use cable ties to manage excess cable length neatly.
- Replace Old Cables: If cables are old, frayed, or damaged, replace them promptly. For DSL, ensure you are using a high-quality phone cord.
4. Firmware Updates
CenturyLink modems receive automatic firmware updates to improve performance and security. However, it's good to be aware of them.
- Automatic Updates: Most modern modems are set to receive updates automatically. Ensure your modem is connected to the internet for these updates to occur.
- Manual Check (if available): Some modem interfaces allow you to manually check for firmware updates. Consult your modem's manual or CenturyLink's support for instructions.
5. Optimize Wi-Fi Performance
While not directly related to the blinking blue light, optimizing your Wi-Fi can improve overall internet experience and reduce potential confusion about connectivity issues.
- Router Placement: Position your router in a central location in your home, away from obstructions like thick walls, metal objects, or other electronics that can cause interference (e.g., microwaves, cordless phones).
- Channel Selection: If your router supports it, experiment with different Wi-Fi channels to find the least congested one in your area. This is especially relevant in densely populated areas.
- Frequency Bands: If you have a dual-band router (2.4GHz and 5GHz), use the 5GHz band for devices closer to the router that require higher speeds, and the 2.4GHz band for devices further away or for less bandwidth-intensive tasks.
6. Understand Your Modem's Lights
Familiarize yourself with the different indicator lights on your specific CenturyLink modem model. Knowing what each light signifies (e.g., solid green for online, blinking red for error) will help you quickly diagnose problems.
Example of Light Indicators (General):
| Indicator Light | Status | Meaning |
|---|---|---|
| Power | Solid | Modem is powered on and functioning. |
| DSL/WAN/Internet | Blinking Blue | Attempting to establish a connection with the network. |
| DSL/WAN/Internet | Solid Blue/Green | Successfully connected to the network. |
| Wi-Fi | Blinking | Wi-Fi network is active and transmitting data. |
| Ethernet Ports | Solid/Blinking | Indicates a wired device is connected and active. |
By understanding these indicators and maintaining your equipment properly, you can significantly enhance the reliability of your CenturyLink internet service.
In conclusion, a blinking blue light on your CenturyLink modem, while a common indicator of connectivity issues, is usually resolvable with a systematic troubleshooting approach. We've explored the primary causes, ranging from simple glitches and loose cables to potential network outages and modem malfunctions. By following the step-by-step guide, starting with a power cycle and progressing through cable checks and direct connection tests, most users can identify and fix the problem themselves. For more persistent issues, advanced steps like a factory reset or consulting modem diagnostics can provide further insights, but it's crucial to know when to escalate. Remember to contact CenturyLink support armed with the information from your troubleshooting efforts. Implementing preventative measures like proper modem placement and regular maintenance will also contribute to a more stable internet experience. Prioritizing these steps ensures you can quickly restore your connection and enjoy uninterrupted service.