Setting up Cox Wi-Fi can seem daunting, but with this comprehensive guide, you'll navigate the process smoothly. We break down every step, from unboxing your equipment to optimizing your network, ensuring a reliable and fast internet connection for your home or business. Get ready to experience seamless connectivity.
Getting Started: What You Need
Before you dive into the physical setup of your Cox Wi-Fi, it's crucial to understand what equipment you'll need and what options are available. Cox offers various internet plans and equipment choices, and knowing these beforehand will streamline the entire process. In 2025-26, Cox continues to expand its fiber-optic network, offering speeds that cater to a wide range of user needs, from casual browsing to heavy streaming and online gaming.
Understanding Your Cox Internet Package
Your first step is to confirm the details of your Cox Internet service plan. This includes the advertised download and upload speeds. Understanding these speeds is essential for choosing the right equipment and for setting realistic expectations for your network's performance. For instance, a plan offering up to 100 Mbps is suitable for a few devices and moderate usage, while plans exceeding 500 Mbps are ideal for households with numerous connected devices, smart home technology, and high-bandwidth activities like 4K streaming or large file downloads.
Cox offers several tiers, often categorized by speed. As of 2025, typical offerings include:
- Essential Internet: Up to 100 Mbps download. Good for basic browsing and email.
- Preferred Internet: Up to 300 Mbps download. Suitable for streaming and multiple users.
- Ultimate Internet: Up to 500 Mbps download. For demanding users and many devices.
- Gigablast: Up to 1 Gbps download. For the most intensive users and future-proofing.
The specific speeds and plan names can vary by region. Always verify with Cox directly for the most accurate information for your location.
Equipment Options: Modem vs. Gateway
Cox provides two primary equipment options for internet connectivity: a modem and a separate router, or a combined modem/router unit known as a gateway. The choice between these can significantly impact your setup and network management.
Modem: This device connects your home to Cox's network. It translates the signal from Cox's infrastructure into a usable internet connection for your home. If you opt for a separate router, the modem will be connected to your router via an Ethernet cable.
Router: This device creates your Wi-Fi network within your home. It takes the internet connection from the modem and broadcasts it wirelessly, allowing your devices to connect. A good router is crucial for Wi-Fi coverage and speed.
Gateway (Modem/Router Combo): This is a single device that performs the functions of both a modem and a router. It's often the simplest solution for many users as it reduces the number of devices and cables. Cox typically offers their own branded gateways, which are designed to work seamlessly with their network.
Renting vs. Buying Your Equipment
Cox offers the option to rent their equipment (modem or gateway) for a monthly fee. This is convenient as Cox will replace faulty equipment and often provides support for their rented devices. However, over the long term, renting can become more expensive than purchasing your own compatible equipment.
Renting Benefits:
- Ease of replacement if faulty.
- Often includes technical support from Cox.
- No upfront purchase cost.
Renting Drawbacks:
- Ongoing monthly fees that add up.
- Limited choice in advanced features or performance.
Buying Benefits:
- One-time cost, saving money in the long run.
- Greater choice in features, performance, and Wi-Fi standards (e.g., Wi-Fi 6, Wi-Fi 6E).
- Potentially better performance and coverage depending on the model.
Buying Drawbacks:
- Requires ensuring compatibility with Cox's network (check Cox's approved modem list).
- You are responsible for troubleshooting and replacing faulty equipment.
For 2025-26, Cox maintains a list of approved modems and gateways on their website. It's imperative to consult this list before purchasing your own equipment to ensure it will work with their service. Purchasing your own modem/gateway can be a smart investment, especially for higher-tier internet plans where a more robust router is beneficial.
What to Expect in Your Cox Box
Whether you're renting or buying, your Cox equipment box should contain the following essential items:
- Modem or Gateway: The main internet device.
- Power Adapter: To power the device.
- Ethernet Cable: For wired connections (modem to router, or device to router/gateway).
- Coaxial Cable: To connect the modem/gateway to the wall outlet.
- Setup Guide: A basic instruction booklet.
If you've ordered a separate router, it will come with its own power adapter and Ethernet cables. Ensure all components are present before you begin the setup process.
Unboxing and Physical Setup
Once you have your Cox equipment and have confirmed your internet plan details, it's time to unbox everything and prepare for the physical connections. This stage is straightforward but requires attention to detail to ensure all cables are connected correctly.
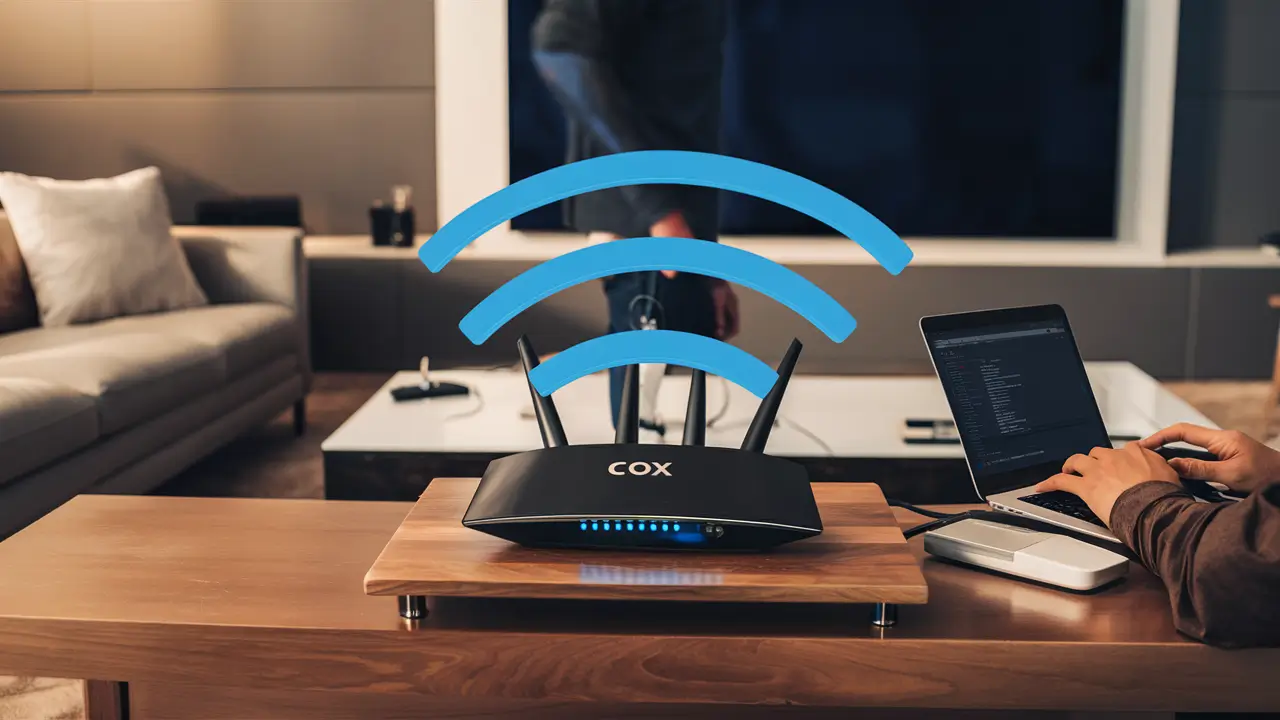
Choosing the Optimal Location for Your Equipment
The placement of your modem and especially your Wi-Fi router (or gateway) is critical for optimal network performance and coverage. Consider these factors:
- Central Location: For Wi-Fi, the ideal spot is as close to the center of your home as possible. This helps the signal reach all areas evenly.
- Open Space: Avoid placing your router in enclosed cabinets, behind large furniture, or near thick walls, as these can obstruct the Wi-Fi signal.
- Away from Interference: Keep your router away from other electronic devices that can cause interference, such as microwaves, cordless phones, and Bluetooth devices.
- Elevation: Placing your router on a higher shelf or surface can improve signal distribution.
- Proximity to Coaxial Outlet: Your modem/gateway needs to be near the coaxial cable outlet provided by Cox.
If you're using a separate router and modem, you'll need to place the modem near the coaxial outlet and then connect the router to the modem via an Ethernet cable. The router can then be positioned in a more central location for better Wi-Fi coverage.
Connecting the Coaxial Cable
The coaxial cable is the lifeline from Cox's network to your home. It's a thick, round cable with a threaded connector.
- Locate the Cox Outlet: Find the coaxial cable outlet on your wall. This is typically a round port with a threaded center.
- Connect to the Wall: Screw one end of the coaxial cable securely onto the wall outlet. Hand-tighten is usually sufficient; avoid over-tightening with tools.
- Connect to the Modem/Gateway: Screw the other end of the coaxial cable into the "Cable In," "RF In," or similar port on the back of your Cox modem or gateway. Again, hand-tighten.
Ensure the cable is not kinked or damaged, as this can affect signal quality.
Connecting the Power Adapter
Every network device requires power to operate.
- Plug into Device: Connect the power adapter cable to the power port on your modem or gateway.
- Plug into Outlet: Plug the power adapter into a working electrical outlet. It's recommended to plug it directly into the wall rather than a surge protector initially, to rule out the surge protector as a cause of issues.
Once plugged in, the device will begin to power on. You'll typically see indicator lights on the front panel start to illuminate.
Connecting Your Modem and Router
This section details the physical connections between your modem and router. If you are using a Cox gateway, this step is simplified as the modem and router functions are combined in one unit. However, understanding these connections is still valuable for troubleshooting.
Modem-Only Setup
If you have a separate modem and router, the modem is the first device to be powered on and connected to Cox's network. Once the modem is online, it will then provide internet access to your router.
- Power On Modem: Ensure the modem is powered on and has established a connection (indicated by stable lights, which we'll cover in the next section).
- Connect Modem to Router: Take an Ethernet cable. Plug one end into the Ethernet port on your modem (usually labeled "LAN" or "Ethernet").
- Connect to Router WAN Port: Plug the other end of the Ethernet cable into the "WAN" (Wide Area Network) or "Internet" port on your router. This port is typically a different color or set apart from the other Ethernet ports on the router.
This connection allows the router to receive the internet signal from the modem.
Router-Only Setup (if applicable)
In some rare cases, you might have a separate modem provided by Cox that's already activated, and you're adding your own router. The process is the same as above: connect the modem's Ethernet port to the router's WAN port.
Gateway Setup
If you are using a Cox gateway, the setup is simpler:
- Connect Coaxial Cable: Connect the coaxial cable to the wall outlet and the gateway.
- Connect Power: Connect the power adapter to the gateway and plug it into an electrical outlet.
The gateway will handle both the internet connection and the Wi-Fi broadcasting.
Connecting Devices via Ethernet
While Wi-Fi is convenient, wired Ethernet connections generally offer the most stable and fastest speeds. You can connect devices directly to your router or gateway using Ethernet cables.
- Locate Ethernet Ports: On your router or gateway, find the LAN (Local Area Network) Ethernet ports. These are usually numbered (e.g., 1, 2, 3, 4).
- Connect Device: Plug one end of an Ethernet cable into one of these LAN ports.
- Connect to Device: Plug the other end of the Ethernet cable into the Ethernet port on your computer, gaming console, smart TV, or other compatible device.
Ensure your device is configured to obtain an IP address automatically (which is the default for most devices). This direct connection bypasses potential Wi-Fi interference and is ideal for stationary devices that require high bandwidth and low latency.
Initial Configuration and Activation
Once the physical connections are made, the next crucial step is activating your service with Cox and configuring your network settings. This is where your internet connection officially comes to life.
Understanding Modem/Gateway Lights
Your modem or gateway has indicator lights that provide valuable information about its status and connection. The exact labels and behavior can vary by model, but generally, you'll see lights for:
- Power: Indicates the device is receiving power. Should be solid.
- Downstream: Shows the connection to Cox's network (download). May blink during startup and become solid when connected.
- Upstream: Shows the connection back to Cox's network (upload). Similar behavior to downstream.
- Online/Internet: Indicates a successful connection to Cox's network. Should be solid when active.
- Wi-Fi (2.4GHz/5GHz): For gateways, these indicate the Wi-Fi radios are active. May blink when devices are connected or transmitting data.
- Ethernet: Lights up when a device is connected via Ethernet cable.
Consult your specific modem or gateway manual for a detailed explanation of its lights.
Activating Your Cox Service
Cox requires you to activate your new equipment. This process typically involves a few steps:
- Power Up: Ensure your modem/gateway is powered on and connected to the coaxial cable. Wait a few minutes for the device to boot up and establish a basic connection.
- Connect a Computer: Connect a computer directly to your modem/gateway using an Ethernet cable. This ensures a stable connection for the activation process. If you only have wireless devices, try to connect to the default Wi-Fi network (SSID and password are often on a sticker on the device).
- Open a Web Browser: Launch a web browser (like Chrome, Firefox, Safari, or Edge).
- Navigate to Cox Activation Page: In the address bar, type the activation URL provided by Cox. This is often something like
cox.com/activateor a specific IP address provided in your setup guide. - Follow On-Screen Instructions: The Cox activation portal will guide you through the process. You may need to provide your account information, serial number of your modem/gateway, and confirm your service plan.
- Wait for Confirmation: The activation process can take anywhere from 5 to 30 minutes. Your modem/gateway lights will change as it connects to Cox's network. Once activation is complete, you should have internet access.
If you encounter issues during activation, restart your modem/gateway and try again. If problems persist, contact Cox customer support.
Setting Up Your Wi-Fi Network Name (SSID) and Password
Once your internet is active, you'll want to configure your Wi-Fi network. For gateways and most routers, this is done through a web-based interface.
- Access Router/Gateway Interface: Open a web browser on a connected device. Type the router's IP address into the address bar. Common default IP addresses are
192.168.1.1or192.168.0.1. You can also often find this information on a sticker on the device or in its manual. For Cox gateways, it might be a specific URL like192.168.0.1. - Log In: You'll be prompted for a username and password. The default credentials are often printed on the device itself or in the manual. For Cox gateways, common defaults might be admin/admin or admin/password. It's crucial to change these defaults immediately for security.
- Find Wi-Fi Settings: Navigate through the interface to find the Wi-Fi or Wireless settings section.
- Change SSID: The SSID (Service Set Identifier) is the name of your Wi-Fi network that appears when you search for networks. Choose a unique name. For example, instead of "CoxWifi," you might choose "SmithHomeNetwork."
- Set Wi-Fi Password (WPA2/WPA3): This is the most critical security step. Choose a strong, unique password. Use a combination of uppercase and lowercase letters, numbers, and symbols. Avoid easily guessable information. Cox strongly recommends using WPA2 or WPA3 encryption for the best security.
- Configure Both Bands (if applicable): Most modern gateways and routers broadcast on both 2.4 GHz and 5 GHz bands. The 2.4 GHz band offers wider range but slower speeds, while the 5 GHz band offers faster speeds but a shorter range. You can set different SSIDs and passwords for each band, or use the same ones for simplicity (band steering).
- Save Changes: Apply and save your settings. Your router/gateway will likely restart.
After the restart, your Wi-Fi network will appear with your new SSID, and you can connect your devices using your new password.
Default Network Details
When you first set up your Cox equipment, it will come with default network names (SSIDs) and passwords. These are usually printed on a sticker on the device itself. It is highly recommended to change these immediately:
- Default SSID: Often generic, like "CoxWifi" or a model-specific name.
- Default Password: A randomly generated string of characters.
While convenient for initial setup, these default credentials are known and can be a security risk if not changed promptly. Always refer to your device's sticker or manual for these initial details.
Securing Your Cox Wi-Fi Network
A secure Wi-Fi network is paramount to protect your personal data and prevent unauthorized access. In 2025-26, with the increasing number of connected devices and sophisticated cyber threats, robust security measures are more important than ever.
Changing Default Login Credentials
As mentioned, the first and most crucial security step is changing the default administrator login credentials for your router or gateway. If you don't do this, anyone who knows the default credentials can access your router's settings, potentially changing your Wi-Fi password, monitoring your activity, or even reconfiguring your network.
Steps:
- Access your router/gateway's web interface (e.g.,
192.168.0.1). - Log in with the default username and password.
- Navigate to the "Administration," "System," or "Security" settings.
- Find the option to change the administrator password.
- Choose a strong, unique password for your router login.
- Save your changes.
Keep this administrator password in a safe place, as you'll need it if you ever want to change your Wi-Fi settings again.
Choosing Strong Wi-Fi Encryption (WPA2/WPA3)
Wi-Fi encryption scrambles the data transmitted over your wireless network, making it unreadable to anyone without the correct password. Cox, like most ISPs, supports modern encryption standards.
- WPA2 (Wi-Fi Protected Access II): This has been the standard for many years and offers strong security. It uses AES encryption, which is highly effective.
- WPA3 (Wi-Fi Protected Access III): This is the latest standard and offers enhanced security features, including improved protection against brute-force attacks and a more streamlined connection process for devices.
Recommendation: Always select WPA2 or, preferably, WPA3 for your Wi-Fi security. Avoid older, weaker protocols like WEP or WPA, as they are easily compromised.
Steps:
- Access your router/gateway's Wi-Fi settings.
- Under "Security" or "Encryption," select "WPA2-PSK" or "WPA3-Personal." If your router supports both, WPA3 is the preferred choice. Some routers offer a "WPA2/WPA3 Mixed Mode" for compatibility with older devices.
- Ensure the encryption type is set to AES.
- Set a strong, unique Wi-Fi password (PSK - Pre-Shared Key).
- Save your changes.
Creating a Strong Wi-Fi Password
Your Wi-Fi password (also known as the WPA2/WPA3 passphrase) is what users enter to connect to your network. A weak password is an open invitation for unauthorized access.
Characteristics of a strong password:
- Length: At least 12-16 characters is recommended.
- Complexity: Mix of uppercase letters, lowercase letters, numbers, and symbols (!@#$%^&*).
- Uniqueness: Do not use common words, personal information (names, birthdays), or sequential numbers.
- Randomness: A password generator can help create truly random and strong passwords.
Example: Instead of "Password123," consider "Tr33-B@n@n@$!9!".
If you have a Cox gateway, the default password is often printed on the device. It's imperative to change this immediately.
Guest Network Options
Many modern routers and gateways offer a "Guest Network" feature. This allows you to create a separate Wi-Fi network for visitors, keeping them off your main network and protecting your private devices and data.
- Benefits:
- Isolation: Guest devices cannot access your personal files or other devices on your main network.
- Convenience: You can provide guests with easy access without sharing your main Wi-Fi password.
- Security: If a guest's device is compromised, it's less likely to affect your primary network.
- Setup:
- Access your router/gateway's settings.
- Look for a "Guest Network" or "Guest Wi-Fi" option.
- Enable it, assign a separate SSID, and set a strong, unique password for the guest network.
- You can often set time limits or bandwidth restrictions for the guest network.
Using a guest network is a best practice for anyone who frequently has visitors or needs to provide temporary internet access.
Firmware Updates
Router and gateway manufacturers, including Cox, regularly release firmware updates. These updates often include security patches to fix vulnerabilities, improve performance, and add new features. Keeping your device's firmware up-to-date is a vital security measure.
- Automatic Updates: Many modern gateways and routers can be configured to download and install firmware updates automatically. This is the easiest and most recommended method.
- Manual Updates: If automatic updates are not available or disabled, you will need to periodically check your router manufacturer's website for new firmware and follow their instructions to install it manually via the web interface.
For Cox-provided gateways, firmware updates are typically pushed out by Cox automatically. If you own your own router, you are responsible for managing its firmware.
Optimizing Your Cox Wi-Fi Performance
Even with a strong connection, Wi-Fi performance can be affected by various factors. Optimizing your network ensures you get the most out of your Cox internet speeds and enjoy a smooth experience across all your devices.
Understanding Wi-Fi Bands (2.4 GHz vs. 5 GHz)
As mentioned earlier, most modern routers and gateways broadcast on two frequency bands:
- 2.4 GHz:
- Pros: Longer range, better at penetrating walls and obstacles.
- Cons: Slower speeds, more prone to interference from other devices (microwaves, Bluetooth, cordless phones).
- Best for: Devices that are far from the router, or devices that don't require high speeds (e.g., smart home devices, basic browsing).
- 5 GHz:
- Pros: Faster speeds, less interference.
- Cons: Shorter range, struggles with physical obstructions.
- Best for: Devices that are closer to the router and require high bandwidth (e.g., 4K streaming, online gaming, large file downloads).
Optimization Tip: If your router supports band steering, it will automatically connect devices to the best band. If not, consider creating separate SSIDs for each band (e.g., "MyNetwork_2.4GHz" and "MyNetwork_5GHz") and manually connect devices to the most appropriate one based on their location and usage.
Router Placement Revisited
The physical location of your router remains one of the most significant factors in Wi-Fi performance. Reiterate the importance of a central, elevated, and unobstructed location. Avoid placing it near metal objects, mirrors, or aquariums, as these can also degrade the signal.
Channel Selection
Wi-Fi networks operate on specific channels within the 2.4 GHz and 5 GHz bands. If many Wi-Fi networks in your area are using the same channel, it can lead to congestion and slower speeds. Most routers automatically select the best channel, but manual adjustment can sometimes help.
- 2.4 GHz Channels: Channels 1, 6, and 11 are generally recommended because they don't overlap with each other.
- 5 GHz Channels: There are more non-overlapping channels available, and congestion is less common.
Optimization Tip: Use a Wi-Fi analyzer app on your smartphone or computer to see which channels are most congested in your area. Then, log into your router's settings and manually select a less crowded channel.
Firmware Updates (Again!)
We've stressed this for security, but it's also crucial for performance. Manufacturers often release firmware updates that include optimizations for Wi-Fi performance, bug fixes, and improved stability. Ensure your router's firmware is up-to-date.
Quality of Service (QoS) Settings
Quality of Service (QoS) settings allow you to prioritize certain types of traffic or devices on your network. For example, you can give video streaming or online gaming higher priority than background downloads.
- How it works: You can often set rules based on device type, IP address, or port numbers.
- Benefits: Ensures that critical applications receive sufficient bandwidth, reducing lag and buffering, especially when your network is heavily utilized.
Optimization Tip: If you experience buffering during streaming or lag during gaming, explore your router's QoS settings. Prioritize your streaming devices or gaming consoles. Be cautious not to over-prioritize, as it can starve other essential services.
Mesh Wi-Fi Systems and Extenders
For larger homes or homes with "dead zones" where Wi-Fi signal is weak or non-existent, consider these solutions:
- Wi-Fi Extenders (Repeaters): These devices pick up your existing Wi-Fi signal and rebroadcast it, extending the coverage area. They are generally inexpensive but can sometimes halve the available bandwidth.
- Mesh Wi-Fi Systems: These consist of a main router and one or more satellite nodes that work together to create a single, seamless Wi-Fi network throughout your home. They offer superior performance and coverage compared to extenders and are managed as a single network.
Recommendation: While extenders can be a quick fix, a mesh Wi-Fi system is a more robust and future-proof solution for comprehensive coverage in larger homes. Ensure any mesh system you consider is compatible with your Cox internet service.
Wired Connections for Key Devices
For devices that are stationary and require the most reliable and fastest connection, a wired Ethernet connection is always superior to Wi-Fi. This includes smart TVs, gaming consoles, desktop computers, and network-attached storage (NAS) devices.
Optimization Tip: If you have a Cox Gigablast plan, ensure you're using gigabit-capable Ethernet ports on your router and devices, and Cat 5e or Cat 6 Ethernet cables, to take full advantage of the speeds.
Troubleshooting Common Cox Wi-Fi Issues
Despite best efforts, you might encounter issues with your Cox Wi-Fi. Here are some common problems and how to resolve them.
No Internet Connection
This is the most frustrating problem. Start with the basics:
- Check Modem/Gateway Lights: Are the "Online" or "Internet" lights solid? If not, there might be an issue with Cox's service or your coaxial connection.
- Power Cycle Your Equipment: Turn off your modem/gateway and router (if separate). Unplug them from power. Wait 30-60 seconds. Plug the modem/gateway back in and wait for it to fully boot up (lights should be stable). Then, plug in your router and wait for it to boot up.
- Check Cables: Ensure all coaxial and Ethernet cables are securely connected and not damaged.
- Bypass Router: If using a separate router, connect a computer directly to the modem via Ethernet. If you get internet this way, the issue is likely with your router.
- Check Cox Service Status: Visit the Cox website or app to see if there are any reported outages in your area.
- Contact Cox Support: If the above steps don't resolve the issue, it's time to contact Cox for assistance.
Slow Wi-Fi Speeds
You're paying for a certain speed, but getting much less. Try these:
- Test Speed with Ethernet: Connect a computer directly to your modem/gateway via Ethernet and run a speed test (e.g., Cox Speed Test, Speedtest.net). If speeds are as expected, the issue is with your Wi-Fi.
- Test Wi-Fi Speeds Near Router: Run speed tests on Wi-Fi devices close to the router. If speeds are good here but poor elsewhere, you have a coverage issue.
- Restart Router/Gateway: A simple restart can often resolve temporary performance glitches.
- Check for Interference: Move your router away from other electronics.
- Change Wi-Fi Channel: Use a Wi-Fi analyzer to find a less congested channel.
- Update Router Firmware: Ensure your router is running the latest firmware.
- Consider a Router Upgrade or Mesh System: If your current router is old or not powerful enough for your needs, it might be time for an upgrade.
Wi-Fi Signal Dropping or Intermittent Connection
Your Wi-Fi signal is unstable.
- Check Router Placement: Ensure it's not in a location that causes signal obstruction.
- Reduce Interference: Move the router away from interfering devices.
- Check for Overheating: Ensure the router has adequate ventilation.
- Update Firmware: Outdated firmware can cause instability.
- Check for Too Many Devices: If you have an older router, it might struggle to handle a large number of connected devices simultaneously.
- Consider a Mesh System: For consistent coverage throughout your home, a mesh system is ideal.
Cannot Connect to Wi-Fi
Your devices can't find or connect to your network.
- Verify SSID and Password: Double-check that you're selecting the correct network name and entering the password exactly as it's set (case-sensitive).
- Restart Device: Turn the device you're trying to connect off and on again.
- Forget Network and Reconnect: On your device, go to Wi-Fi settings, "forget" your network, and then try to reconnect by re-entering the password.
- Check Router Status: Ensure your router's Wi-Fi lights are on.
- Check Connected Device Limit: Some routers have a limit on the number of devices that can connect.
- Factory Reset Router (Last Resort): If all else fails, you can perform a factory reset on your router/gateway. This will revert all settings to default, so you'll need to reconfigure your Wi-Fi name and password.
Security Concerns (Unauthorized Access)
You suspect someone is using your Wi-Fi.
- Change Wi-Fi Password Immediately: Use a strong, unique password.
- Change Router Admin Password: Ensure your router's login credentials are not default.
- Enable WPA2/WPA3 Encryption: Ensure you are using the strongest available encryption.
- Check Connected Devices List: Most routers allow you to see a list of currently connected devices. Disconnect any you don't recognize.
- Enable Guest Network: Use this for visitors to keep them off your main network.
Advanced Tips for Power Users
For those who want to fine-tune their network or get the absolute most out of their Cox internet, here are some advanced strategies.
Static IP Addresses
By default, your modem/gateway receives a dynamic IP address from Cox, which can change periodically. For most users, this is fine. However, if you host servers (game servers, web servers), use VPNs that require specific IP configurations, or need consistent remote access to your home network, you might consider a static IP address.
How to Get: Static IP addresses are typically an add-on service from Cox and may incur an additional monthly fee. You'll need to contact Cox to inquire about availability and pricing for your plan. Once provisioned, you'll configure your router to use the static IP address provided by Cox.
Port Forwarding
Port forwarding allows specific types of internet traffic to bypass your router's firewall and reach a particular device on your local network. This is commonly used for:
- Online Gaming: To reduce latency and ensure stable connections for multiplayer games.
- Remote Access: To access devices like security cameras, NAS drives, or home servers from outside your network.
- VoIP Services: For clear voice communication.
How to Set Up:
- Identify the Device's IP Address: Ensure the device you want to port forward to has a static local IP address (configure this within your router's DHCP settings or on the device itself).
- Find the Required Ports: Consult the documentation for the application or game to determine which ports need to be forwarded.
- Access Router Settings: Log into your router's web interface.
- Navigate to Port Forwarding: Look for a section labeled "Port Forwarding," "Virtual Servers," or similar.
- Create a New Rule: Enter the external port(s), internal port(s), protocol (TCP, UDP, or both), and the internal IP address of the device.
- Save and Test: Save the settings and test if the port is open using an online port checker tool.
Security Note: Port forwarding can create security risks if not done carefully. Only forward ports that are absolutely necessary and ensure the devices receiving the forwarded traffic are secure.
DMZ (Demilitarized Zone)
The DMZ feature allows you to expose a specific device on your local network to the internet, bypassing most of your router's firewall. This is a more aggressive form of port forwarding and is generally less secure.
When to Use: Typically used as a last resort for applications that absolutely cannot function with standard port forwarding, or for specific testing scenarios. It is NOT recommended for general use.
How to Set Up: In your router's settings, find the DMZ option and enter the local IP address of the device you wish to place in the DMZ. Ensure this device is highly secured.
VPN Passthrough
If you use a Virtual Private Network (VPN) to connect to your company's network or for enhanced privacy, your router needs to support VPN passthrough for protocols like PPTP, L2TP, and IPsec. Most modern routers have this enabled by default.
Troubleshooting: If you're having trouble connecting to your VPN through your home Wi-Fi, check your router's settings to ensure VPN passthrough is enabled for the relevant protocols.
MAC Address Filtering
MAC (Media Access Control) address filtering is a security feature that allows you to create a list of approved devices that can connect to your Wi-Fi network. Only devices with MAC addresses on this list will be able to join.
Pros: Can add an extra layer of security by preventing unknown devices from connecting.
Cons: Can be cumbersome to manage, especially if you have many devices or frequently have guests. MAC addresses can also be spoofed by sophisticated attackers, making it not a foolproof security measure on its own.
How to Set Up: You'll need to find the MAC address of each device you want to allow (usually in its network settings) and then enter these addresses into the MAC filtering list in your router's security settings.
DNS Server Settings
DNS (Domain Name System) servers translate human-readable website names (like google.com) into IP addresses that computers understand. Your router typically uses DNS servers provided by Cox by default.
Alternative DNS Servers: You can manually change your DNS servers to third-party providers like Google DNS (8.8.8.8 and 8.8.4.4) or Cloudflare DNS (1.1.1.1 and 1.0.0.1). These can sometimes offer faster resolution times, improved privacy, or content filtering capabilities.
How to Set Up: In your router's WAN or Internet settings, you can typically specify custom DNS server IP addresses.
Conclusion
Setting up your Cox Wi-Fi is a foundational step to enjoying reliable internet connectivity. By following this comprehensive guide, you've learned how to unbox and physically connect your equipment, activate your service, and secure your network with strong passwords and encryption. We've also explored essential optimization techniques, from understanding Wi-Fi bands to strategic router placement, and provided clear steps for troubleshooting common issues. Whether you're a casual user or a power user seeking advanced configurations like port forwarding or static IPs, this guide equips you with the knowledge to manage your Cox Wi-Fi effectively.
Remember that consistent performance and security stem from diligent setup and ongoing maintenance. Regularly review your network security, update firmware, and optimize settings as your needs evolve. For the most up-to-date information and support specific to your Cox service plan and equipment, always refer to Cox's official resources. With the right approach, you can ensure your Cox Wi-Fi network is fast, secure, and perfectly suited to your digital life in 2025 and beyond.