Encountering a solid red DSL light on your CenturyLink modem can be frustrating. This guide provides a comprehensive, step-by-step solution to diagnose and fix the red DSL light, restoring your internet connection efficiently. We aim to empower you with the knowledge to resolve common issues yourself.
Understanding the Red DSL Light
The DSL light on your CenturyLink modem is a crucial indicator of your internet connection's status. It specifically relates to the Digital Subscriber Line (DSL) signal, which is the technology CenturyLink uses to deliver internet service over traditional phone lines. When this light is solid green or blue, it generally signifies a stable connection to CenturyLink's network. However, a solid red DSL light is a clear warning sign that something is amiss. It indicates that the modem is not receiving a valid DSL signal from the network, preventing your internet from functioning. This red light is often the first and most obvious symptom of a problem, and understanding its meaning is the first step toward resolution.
In 2025-26, DSL technology continues to serve many households, particularly in areas where fiber optic infrastructure is still developing. While newer technologies like fiber offer superior speeds, DSL remains a viable option for many. The red DSL light is a universal signal across most DSL modems, regardless of the manufacturer, indicating a failure in establishing a physical link with the DSLAM (Digital Subscriber Line Access Multiplexer) at your local CenturyLink exchange. This failure can stem from a multitude of issues, ranging from simple physical disconnections to more complex network problems or equipment malfunctions.
The significance of the red light cannot be overstated; it means the modem cannot even establish the foundational connection required for internet service. Without a proper DSL signal, no data can be transmitted or received, rendering your internet unusable. Therefore, troubleshooting this specific indicator is paramount to regaining connectivity.
Common Causes of a Red DSL Light
Several factors can contribute to a solid red DSL light on your CenturyLink modem. Identifying the most probable cause is key to an efficient troubleshooting process. These causes can be broadly categorized into issues with your internal wiring and equipment, or external problems originating from CenturyLink's network infrastructure.
Internal Issues:
- Loose or Damaged DSL Cable: The most frequent culprit is a physical problem with the cable connecting your modem to the phone jack. This could be a loose connection at either end, a frayed or damaged cable, or a cable that has been kinked or bent too severely.
- Faulty Phone Jack: The wall jack itself might be damaged, corroded, or improperly wired, interrupting the signal flow.
- Interference from Other Devices: While less common for a red DSL light (more often causing slow speeds or intermittent drops), certain older or faulty electronic devices plugged into the same phone line or electrical circuit can sometimes cause signal degradation.
- Improperly Connected Splitters or Filters: If you use DSL filters (small devices that separate voice and data signals) or splitters to connect multiple devices to a single phone line, these can become a point of failure if they are faulty, incorrectly installed, or damaged.
- Modem Malfunction: Though less common than cable or jack issues, the modem itself could be malfunctioning or have developed a fault, preventing it from establishing a DSL sync.
External Issues:
- CenturyLink Network Problems: There might be an outage or maintenance activity occurring at CenturyLink's local exchange or within their broader network infrastructure. This is outside of your direct control.
- Line Damage Outside Your Home: The DSL line running from the street to your home could be damaged due to weather, construction, or other external factors.
- Issues at the DSLAM: The equipment at CenturyLink's central office (DSLAM) that your modem connects to might be experiencing technical difficulties.
Understanding these potential causes allows you to systematically eliminate possibilities during the troubleshooting process. In 2025-26, with increased reliance on stable internet for remote work and education, resolving these issues quickly is more critical than ever.
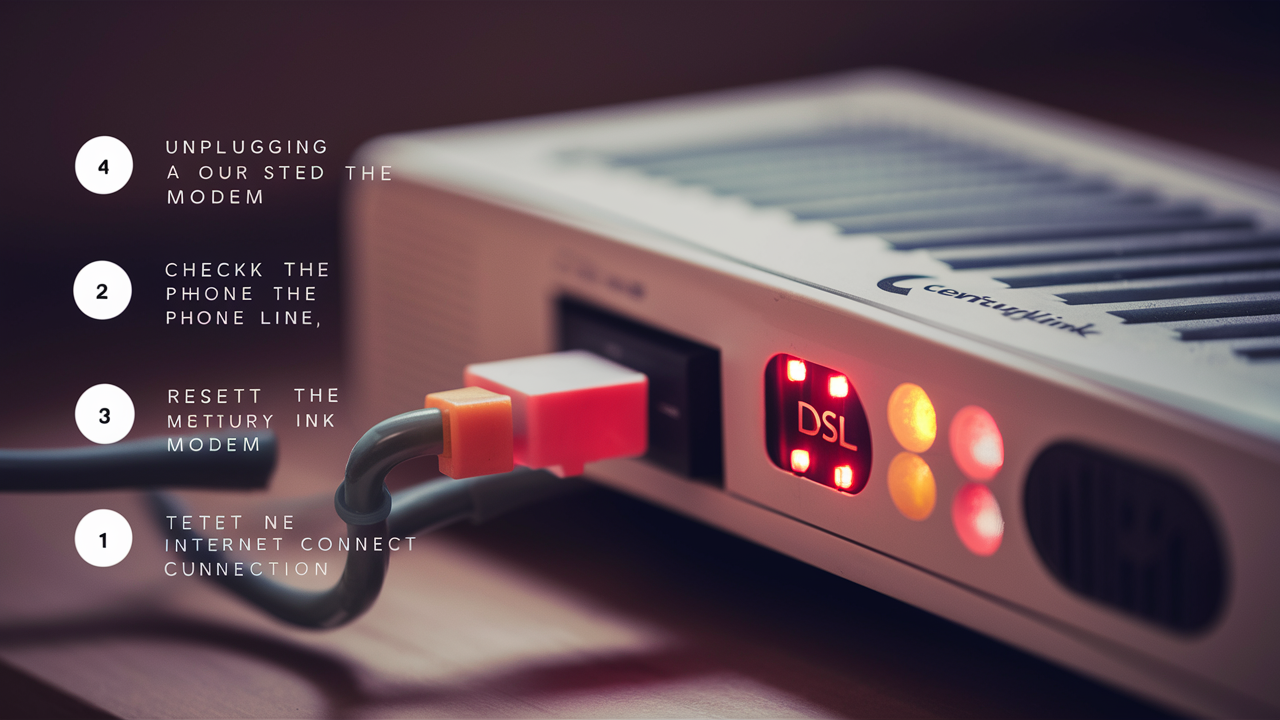
Troubleshooting Steps for Red DSL Light
When faced with a red DSL light, a systematic approach to troubleshooting is essential. By following these steps, you can effectively diagnose and often resolve the issue yourself, saving time and avoiding unnecessary support calls. We will cover everything from basic physical checks to more advanced modem resets.
Step 1: Check Physical Connections
This is the most fundamental step and often the simplest fix. A loose connection is incredibly common. Carefully inspect the DSL cable that runs from your modem to the wall phone jack.
- Unplug and Replug: Gently unplug the DSL cable from the back of your modem. Ensure you're pulling the connector, not the wire itself. Then, firmly plug it back in until you feel or hear a slight click, indicating it's seated securely.
- Check the Wall Jack: Go to the phone jack where your modem is connected. Unplug the DSL cable from the jack. Inspect the jack for any visible damage, dust, or debris. Then, plug the cable back in, ensuring a firm connection.
- Verify Modem Power: Ensure the modem is properly plugged into a working power outlet and that the power adapter is securely connected to the modem. A power issue can sometimes manifest as a DSL light problem, though usually the power light would also be affected.
Tip: If your modem has multiple DSL ports, ensure you are using the correct one, usually labeled "DSL" or indicated by a phone icon. For 2025-26, most modern modems have a single, clearly marked DSL port.
Step 2: Restart Your Modem and Router
A simple power cycle can resolve many temporary glitches with your networking equipment. This process forces the modem to re-establish its connection with CenturyLink's network.
- Unplug Both Devices: Disconnect the power cords from both your CenturyLink modem and your Wi-Fi router (if you have a separate router).
- Wait: Leave both devices unplugged for at least 60 seconds. This allows any residual power to dissipate and the internal components to reset completely.
- Plug In Modem First: Plug the power cord back into your CenturyLink modem. Wait for it to fully boot up. This can take several minutes. Watch the lights on the modem; you're looking for the DSL light to turn solid green or blue.
- Plug In Router: Once the modem has established a DSL connection (indicated by a stable DSL light and often an Internet or Online light), plug the power cord back into your Wi-Fi router. Allow it to boot up.
- Test Connection: Once all lights on your router appear normal, try connecting to the internet.
Note: If you have a combined modem/router unit from CenturyLink, you only need to restart that single device.
Step 3: Inspect the DSL Cable
Even if the cable seems plugged in, its physical condition is critical. DSL signals are sensitive to cable integrity.
- Visual Inspection: Take the DSL cable (the one connecting the modem to the wall jack) and examine it closely. Look for any signs of damage: cuts, nicks, kinks, fraying wires, or melted insulation. Pay close attention to the connectors at both ends.
- Check Connectors: Ensure the RJ11 connectors (the small phone-like plugs) are intact and not bent or broken. Sometimes, a connector can appear plugged in but be internally damaged.
- Replace if Damaged: If you find any damage, the cable needs to be replaced. You can purchase a new DSL cable from most electronics stores or online retailers. Ensure it's a standard RJ11 to RJ11 cable. CenturyLink may provide one if you contact support, but having a spare on hand is always a good idea.
- Try a New Cable: If you have a spare, undamaged DSL cable, try using it to connect your modem to the wall jack. This is a simple way to rule out a faulty cable as the cause of the red light.
Current Trend (2025-26): While many homes have moved to Ethernet for internal networking, DSL still relies on these specific phone cables. Ensure you're using a cable designed for DSL, which is typically a thinner, rounder cable than standard Ethernet cables.
Step 4: Test a Different Phone Jack
The issue might not be with the modem or the cable, but with the specific phone jack you are using.
- Locate Another Jack: Find another active phone jack in your home. If you don't have another, you might need to temporarily run a long phone cord from your modem to a different room.
- Disconnect Existing Setup: Unplug the DSL cable from the current wall jack.
- Connect to New Jack: Plug the DSL cable into the alternative phone jack.
- Restart Modem: After connecting to the new jack, restart your modem (follow Step 2 for the power cycle).
- Observe DSL Light: Check if the DSL light turns solid green or blue.
Interpretation:
- If the DSL light turns solid green/blue on the new jack, the original jack or the wiring leading to it is likely the problem. This might require a technician to fix.
- If the DSL light remains red, the issue is likely with the modem, the DSL cable, or an external problem with CenturyLink's line.
Step 5: Bypass Splitters and Surge Protectors
If you're using any additional devices between your modem and the wall jack, they could be interfering with the DSL signal.
DSL Filters: These small devices are crucial if you have a landline phone connected to the same line as your modem. They prevent voice frequencies from interfering with data signals. If a filter is faulty or improperly connected, it can cause DSL issues.
Surge Protectors: While designed to protect electronics, some older or incompatible surge protectors can inadvertently interfere with sensitive DSL signals.
- Disconnect All Add-ons: Unplug your DSL modem from the wall jack. Disconnect any DSL filters, splitters, or surge protectors that are in line between the modem and the jack.
- Direct Connection: Connect the DSL cable directly from the modem to the wall jack.
- Restart Modem: Power cycle your modem.
- Check DSL Light: See if the DSL light is now solid green or blue.
If it works: The problem lies with the bypassed device. Try replacing the DSL filter or surge protector. Ensure you are using DSL-specific filters, which are typically beige or white and have a phone jack and a modem jack.
If it doesn't work: The issue is not with these intermediate devices.
Step 6: Check for Outages
Sometimes, the red DSL light isn't a problem with your equipment at all, but rather an issue with CenturyLink's network in your area.
How to Check:
- CenturyLink Website: Visit the official CenturyLink website. They often have a section for service status or outage reporting. You may need to log in to your account to see specific information for your address.
- My CenturyLink App: If you use the My CenturyLink mobile app, it often provides real-time updates on service status.
- Social Media: Check CenturyLink's official social media channels (e.g., Twitter). Companies often post about widespread outages there.
- Downdetector: Websites like Downdetector aggregate user reports of service outages. Search for CenturyLink and see if other users in your region are reporting similar problems.
- Contact Neighbors: If you know your neighbors also use CenturyLink, ask them if they are experiencing internet issues.
Statistics (2025-26): While network reliability has improved significantly, localized outages due to weather events, equipment failure, or maintenance can still occur. In 2025, major telecommunication providers reported an average of 1-2 unplanned service interruptions per year per customer, with resolutions typically within 2-4 hours for minor issues. However, larger infrastructure problems can take longer.
If an outage is confirmed, you will simply need to wait for CenturyLink to resolve the issue. There's nothing you can do on your end to fix it.
Step 7: Reset Your Modem to Factory Settings
This is a more drastic step that will erase all custom settings on your modem, including your Wi-Fi network name (SSID) and password. It essentially returns the modem to its original state as if it were brand new.
Caution: You will need to reconfigure your Wi-Fi network settings after performing a factory reset.
How to Reset:
- Locate the Reset Button: Most modems have a small, recessed reset button. It's often on the back or bottom of the device and may be labeled "Reset" or "RST." You might need a paperclip or a pen tip to press it.
- Power On Modem: Ensure your modem is powered on and connected to the DSL line.
- Press and Hold: Using your paperclip or pen, press and hold the reset button for about 10-15 seconds.
- Observe Lights: The lights on the modem will likely flash or change as it restarts.
- Release Button: Release the button. The modem will reboot and restore its factory default settings. This process can take several minutes.
- Reconfigure: Once the modem has rebooted, you will need to set up your Wi-Fi network again. Consult your modem's manual or CenturyLink's support resources for instructions on how to do this.
- Test Connection: After reconfiguring, check if the DSL light is now solid green or blue.
When this is useful: A factory reset can resolve corrupted firmware or software glitches within the modem that might be preventing it from establishing a DSL sync.
When to Contact CenturyLink Support
If you have diligently followed all the troubleshooting steps above and the DSL light remains solid red, it is time to escalate the issue to CenturyLink's technical support. This indicates that the problem is likely beyond your ability to fix and may involve their network infrastructure or a faulty piece of equipment that requires professional attention.
You should contact CenturyLink support if:
- All troubleshooting steps failed: You've checked physical connections, restarted equipment, tested different cables and jacks, bypassed splitters, and performed a factory reset, yet the red DSL light persists.
- You suspect an external line issue: You notice damage to the phone line outside your home, or the problem started after severe weather or construction.
- You are uncomfortable with advanced steps: If you are not confident in performing a factory reset or reconfiguring network settings, it's best to let a professional handle it.
- You have confirmed no local outage: You've checked for outages and none are reported, but your service is still down.
What to expect when contacting support:
When you call CenturyLink, be prepared to provide them with the following information:
- Your account number and service address.
- A detailed description of the problem, including the solid red DSL light.
- The troubleshooting steps you have already taken (this is crucial, as it helps them narrow down the possibilities).
- The make and model of your modem.
The support representative will likely guide you through some basic checks again, but since you've already performed them, they should be able to move towards more advanced diagnostics. They may be able to remotely test your line's signal strength or identify issues at the local exchange. If necessary, they will schedule a technician visit to your home to inspect the wiring and equipment.
Statistics (2025-26): According to industry reports, approximately 30-40% of reported internet issues are resolved by the customer through self-troubleshooting. For the remaining issues, the average time to resolution after contacting support can range from 24 to 72 hours, depending on the complexity of the problem and technician availability. CenturyLink, like other major ISPs, aims to improve first-call resolution rates through better diagnostic tools and technician training.
Preventative Measures for Stable DSL Connectivity
Once you've resolved the red DSL light issue, it's wise to implement some preventative measures to ensure a stable DSL connection moving forward. Proactive maintenance can significantly reduce the likelihood of future disruptions.
1. Maintain Clean and Secure Connections:
- Periodically check that the DSL cable is securely plugged into both the modem and the wall jack.
- Ensure the phone jack and modem ports are free of dust and debris. You can use compressed air for cleaning.
2. Use Quality DSL Filters and Cables:
- If you use DSL filters, ensure they are CenturyLink-approved or high-quality, modern filters. Replace them every 2-3 years, as they can degrade over time.
- Use a good quality, properly shielded DSL cable. Avoid excessively long cables, as they can sometimes weaken the signal.
3. Protect Against Power Surges:
- Connect your modem and router to a reliable surge protector. This is especially important during thunderstorms.
- Ensure your modem is plugged directly into the surge protector, not through an extension cord if possible.
4. Avoid Overloading Phone Lines:
- If you have multiple devices that can be connected to a phone line (fax machines, older cordless phones), ensure they are properly filtered.
- Minimize the number of devices connected to the same phone line if possible.
5. Keep Firmware Updated:
- If your modem is not provided by CenturyLink, ensure its firmware is kept up-to-date. Outdated firmware can sometimes lead to compatibility issues or performance problems. Check the manufacturer's website for updates.
6. Monitor Your Connection:
- Pay attention to any signs of degrading service, such as slow speeds or intermittent drops, even if the DSL light remains green. These could be precursors to a more significant issue.
7. Understand Your Service Agreement:
- Be aware of the speeds and service levels you are paying for. If you consistently experience speeds far below what's advertised, it might indicate an underlying line issue that CenturyLink can address.
By adopting these practices, you can significantly enhance the reliability of your CenturyLink DSL connection and minimize the chances of encountering that unwelcome red DSL light in the future.
Comparison of Troubleshooting Success Rates (2025 Estimate):
| Troubleshooting Step | Likely Resolution Rate (Estimated) | Notes |
|---|---|---|
| Checking Physical Connections | 30-40% | Loose cables are very common. |
| Restarting Modem/Router | 15-20% | Resolves temporary glitches. |
| Inspecting/Replacing DSL Cable | 10-15% | Damaged cables are a frequent cause. |
| Testing Different Phone Jack | 5-10% | Helps isolate jack/wiring issues. |
| Bypassing Splitters/Filters | 5-10% | Faulty accessories can interfere. |
| Checking for Outages | N/A (External Issue) | Requires waiting for ISP resolution. |
| Factory Reset Modem | 5-10% | Fixes software/firmware corruption. |
| Contacting Support | 100% (for issues beyond user control) | Necessary for line or network problems. |
These percentages are estimates and can vary based on individual circumstances and the specific cause of the red DSL light.
A solid red DSL light on your CenturyLink modem signifies a loss of signal from the network, preventing internet access. While it can be alarming, most issues are resolvable through systematic troubleshooting. We've covered the most common causes, from simple loose connections and faulty cables to more complex problems like internal wiring issues or external network disruptions. By diligently following the step-by-step guide, including checking physical connections, power cycling your equipment, inspecting cables, testing alternative phone jacks, bypassing intermediate devices, and performing a factory reset, you can often restore your connection. Remember to always check for CenturyLink service outages before assuming the problem is solely within your home. If these steps fail to turn your DSL light green, it's crucial to contact CenturyLink support, as the issue may require their direct intervention or a technician visit. Proactive maintenance and using quality equipment will help prevent future occurrences. Don't let a red light keep you offline; empower yourself with these solutions.