Connecting your TV to Wi-Fi unlocks a world of entertainment, from streaming your favorite shows to accessing smart features. This comprehensive guide will walk you through every step, ensuring a seamless connection for all major TV brands and troubleshooting common issues. Get ready to elevate your viewing experience.
Understanding Wi-Fi Connection for Your TV
In today's digital age, the ability to connect your television to your home's Wi-Fi network is no longer a luxury but a necessity for accessing a vast array of content and features. This connectivity transforms your standard television into a gateway to endless entertainment possibilities. Unlike older models that relied solely on cable or satellite signals, modern TVs, especially smart TVs, leverage Wi-Fi to stream video-on-demand services like Netflix, Hulu, and Disney+, access live TV streaming apps, browse the internet, and even connect with other smart home devices. Understanding how this connection works is the first step to ensuring a smooth and uninterrupted viewing experience. Essentially, your TV acts like any other smart device – a smartphone, tablet, or computer – in that it needs to join your wireless network to communicate with the internet and other devices on your local network.
The primary benefit of connecting your TV to Wi-Fi is the immediate expansion of your entertainment options. You're no longer limited to scheduled broadcasts. Instead, you gain access to a library of on-demand content that you can watch whenever you please. This includes a growing number of 4K and HDR content, offering unparalleled visual fidelity. Furthermore, many smart TVs offer features like app stores, allowing you to download games, news apps, and social media platforms directly onto your television. This makes your TV a more interactive and versatile hub for your home entertainment. In 2025, the landscape of home entertainment is heavily reliant on robust internet connectivity. According to recent industry reports, over 85% of households with smart TVs utilize their Wi-Fi connection for streaming services at least weekly, highlighting the critical role of a stable internet connection for modern television viewing.
There are two main ways your TV can connect to your Wi-Fi: wirelessly, using the built-in Wi-Fi adapter, or wired, using an Ethernet cable. While this guide primarily focuses on Wi-Fi, it's worth noting that a wired connection often provides a more stable and faster connection, which can be crucial for streaming high-definition content. However, wireless connectivity offers greater flexibility in placement and avoids the need for unsightly cables running across your living room. Most modern smart TVs come equipped with integrated Wi-Fi capabilities, making the wireless connection the most common and convenient method. The process typically involves navigating through your TV's settings menu to find the network or internet options, where you can then select your Wi-Fi network and enter your password.
The underlying technology involves your TV communicating with your Wi-Fi router. Your router broadcasts a Wi-Fi signal, and your TV's Wi-Fi adapter picks up this signal. Once connected, your TV can send and receive data packets from the internet. This data includes everything from video streams and app updates to firmware installations. The speed and reliability of this connection are heavily influenced by the strength of the Wi-Fi signal, the bandwidth of your internet plan, and the capabilities of your router. Understanding these elements will help you troubleshoot any issues that may arise and ensure you're getting the best possible performance from your connected TV.
How Wi-Fi Enhances Your TV Experience
The integration of Wi-Fi into televisions has fundamentally reshaped how we consume media. Gone are the days when a TV was merely a passive display for broadcast signals. Today, a Wi-Fi-enabled TV is an interactive portal to a universe of content and functionality. The primary enhancement is undoubtedly the access to streaming services. Platforms like Netflix, Amazon Prime Video, Disney+, and countless others offer vast libraries of movies, TV shows, documentaries, and original content that can be streamed directly to your TV in high definition, and often in 4K resolution with HDR support. This on-demand access provides unparalleled convenience and choice, allowing viewers to curate their entertainment schedules.
Beyond streaming, Wi-Fi connectivity enables your TV to become a hub for various applications. Smart TV app stores offer a growing selection of programs, ranging from YouTube and Spotify for video and music streaming to news aggregators, weather apps, and even casual games. This transforms your television from a simple viewing device into a more versatile entertainment and information center. For example, you can catch up on the latest news from your favorite channels, listen to podcasts, or even participate in video calls if your TV supports it and has a compatible camera accessory. The ability to update your TV's software and firmware wirelessly is another significant benefit. Manufacturers regularly release updates that improve performance, introduce new features, and patch security vulnerabilities. Without Wi-Fi, these updates would often require cumbersome manual downloads and installations.
Furthermore, Wi-Fi facilitates integration with other smart home devices. Many modern TVs can act as a central control point for your smart home ecosystem. You might be able to control smart lights, thermostats, or security cameras directly from your TV's interface or through voice commands if your TV has built-in voice assistant capabilities (like Google Assistant or Amazon Alexa). This creates a more cohesive and convenient smart living experience. The ability to cast content from your smartphone or tablet to your TV is another popular feature enabled by Wi-Fi. Using technologies like Google Cast or Apple AirPlay, you can seamlessly share photos, videos, and even entire app interfaces from your mobile devices to the larger screen of your television, making it easier to share experiences with family and friends. In 2025, the trend towards interconnected home entertainment systems continues to grow, with Wi-Fi being the backbone of this integration.
Understanding Network Requirements
To successfully connect your TV to Wi-Fi, you need a functioning wireless network and a stable internet connection. The core components are your internet service provider (ISP), your modem, and your Wi-Fi router. Your ISP provides the internet signal to your home, which is then translated by the modem into a format that your network devices can use. The Wi-Fi router then broadcasts this internet connection wirelessly, creating your home network. For optimal performance, especially for streaming high-definition content, it's recommended to have an internet speed of at least 25 Mbps. However, for 4K streaming, speeds of 50 Mbps or higher are generally recommended to avoid buffering and ensure a smooth playback experience. Many ISPs offer various speed tiers, and it's wise to choose a plan that meets your household's overall internet usage needs, including multiple devices streaming simultaneously.
Your Wi-Fi router plays a crucial role in the quality of your connection. Routers operating on the 5GHz band generally offer faster speeds and less interference compared to the older 2.4GHz band, though the 2.4GHz band has a longer range. Modern routers often support dual-band technology, allowing you to connect devices to either band, or even a single band that automatically switches for optimal performance. The Wi-Fi standard used by your router also impacts speed and reliability. Wi-Fi 6 (802.11ax) and Wi-Fi 6E are the latest standards, offering significant improvements in speed, capacity, and efficiency, particularly in environments with many connected devices. If your TV supports these newer standards, and your router is also up-to-date, you'll likely experience a more robust connection. As of 2025, Wi-Fi 6 is widely adopted, and Wi-Fi 6E is gaining traction, offering a glimpse into the future of wireless networking.
You will also need your Wi-Fi network's name, also known as the SSID (Service Set Identifier), and its password (also called a passphrase or WPA key). These are typically found on a sticker on your router or were provided by your ISP when you set up your internet service. It's essential to have these details handy before you begin the connection process on your TV. If you've forgotten your Wi-Fi password, you can usually reset it by accessing your router's administrative interface through a web browser or by pressing a reset button on the router itself, though this might reset other network settings. Ensuring your router is placed in a central location, away from obstructions and sources of interference like microwaves or thick walls, can also significantly improve signal strength and, consequently, your TV's Wi-Fi performance.
Preparing for the Wi-Fi Connection
Before you embark on the journey of connecting your TV to your home Wi-Fi network, a few preparatory steps can ensure a smoother and more successful process. Think of this as gathering your tools and understanding the lay of the land before starting a construction project. These preliminary actions address potential roadblocks and set you up for a seamless experience, whether you're connecting a brand-new smart TV or trying to get an older model online.
Gather Your Network Credentials
The most critical piece of information you'll need is your Wi-Fi network's name (SSID) and its password. These are essential for your TV to authenticate with your router and gain access to the internet. Your SSID is the name that appears in the list of available Wi-Fi networks on any device. The password is the security key that protects your network from unauthorized access. In 2025, most home networks use WPA2 or WPA3 encryption, which requires a strong, complex password. You can usually find this information printed on a sticker attached to your Wi-Fi router itself. Alternatively, if you set up your network yourself or had it set up by a professional, you might have this information written down in a safe place, such as a router manual or a dedicated network configuration document. If you've forgotten your password, you'll typically need to log into your router's administration panel via a web browser or, in some cases, perform a router reset, which may require reconfiguring your entire network. Having these credentials ready beforehand will prevent frustrating pauses and potential restarts during the setup process.
Ensure Router is Powered On and Broadcasting
It might sound obvious, but before you start troubleshooting your TV, confirm that your Wi-Fi router is powered on and actively broadcasting its network signal. Check the indicator lights on the router; typically, there's a power light and lights indicating internet connectivity and Wi-Fi activity. If the router is off, plug it in and allow it a few minutes to boot up fully. If the Wi-Fi indicator light is off or blinking erratically, there might be an issue with the router itself or its connection to the modem. In such cases, you might need to restart your modem and router by unplugging them from the power source, waiting about 30 seconds, and then plugging them back in, starting with the modem first, followed by the router. This simple power cycle can resolve many temporary network glitches. By 2025, users are increasingly reliant on their home networks, making this basic check a vital first step.
Check Wi-Fi Signal Strength
The proximity of your TV to your Wi-Fi router significantly impacts the strength and stability of the wireless connection. Thick walls, large furniture, and other electronic devices can interfere with the Wi-Fi signal. Ideally, your TV should be within a reasonable range of the router, with minimal obstructions. Many smart TVs will display a signal strength indicator during the network setup process, often represented by bars similar to those on a smartphone. If the signal appears weak, consider repositioning your router to a more central location in your home or closer to the TV. Alternatively, if moving the router isn't feasible, you might consider using a Wi-Fi extender or a mesh Wi-Fi system to boost the signal in areas of your home where it's weak. For 2025, with the rise of 4K streaming and bandwidth-intensive applications, a strong signal is paramount for a good user experience.
Understand Your TV Model and Remote
Different TV brands and models have slightly different menu structures and navigation methods. Familiarize yourself with your TV's remote control and how to access its main settings menu. Typically, you'll press a "Menu," "Settings," or "Home" button on your remote to bring up the on-screen interface. From there, you'll need to navigate to sections labeled "Network," "Internet," "Connectivity," or "Wi-Fi." If you're unsure, consult your TV's user manual, which is often available online on the manufacturer's website. Many manuals provide detailed, step-by-step instructions specific to your model. Knowing the basic layout and functionality of your remote will make the entire process much more straightforward. For instance, some remotes have dedicated buttons for smart features, while others require you to navigate through a general settings menu.
Connecting Smart TVs to Wi-Fi: A Step-by-Step Guide
Connecting a smart TV to your Wi-Fi network is generally a straightforward process, designed to be user-friendly. While the exact steps can vary slightly between brands like Samsung, LG, Sony, TCL, and others, the underlying principles remain the same. This section will provide a generalized guide, followed by specific nuances for popular brands, ensuring you can get your smart TV online and start enjoying its full capabilities.
General Step-by-Step Process
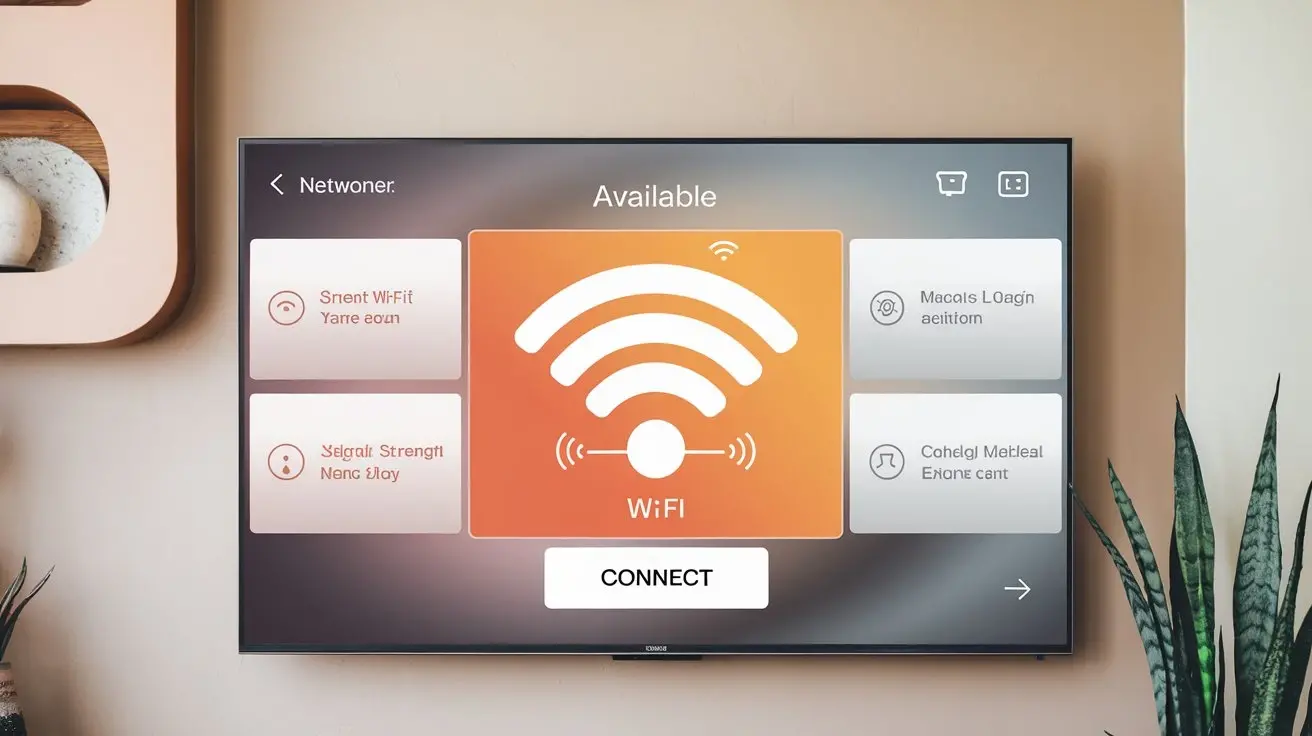
1. Power on your TV: Ensure your smart TV is plugged in and powered on. 2. Access the Settings Menu: Using your TV remote, press the "Menu," "Settings," or "Home" button. This will typically bring up an on-screen interface. 3. Navigate to Network Settings: Look for an option labeled "Network," "Internet," "Connection," or "Wi-Fi." Select this option. 4. Select Network Setup/Connection: Within the network settings, find an option such as "Network Setup," "Set Up Connection," or "Wi-Fi Connection." 5. Choose Wireless Connection: Select the option for a wireless or Wi-Fi connection. Some TVs might also offer a wired (Ethernet) option, but for this guide, we're focusing on wireless. 6. Scan for Available Networks: Your TV will now scan for available Wi-Fi networks in your vicinity. This process may take a few moments. 7. Select Your Wi-Fi Network (SSID): From the list of detected networks, find and select your home Wi-Fi network's name (SSID). 8. Enter Your Wi-Fi Password: You will be prompted to enter your Wi-Fi password using the on-screen keyboard and your remote. Be careful to enter it exactly as it is, paying attention to uppercase and lowercase letters, numbers, and symbols. 9. Connect and Confirm: Once the password is entered, select "Connect," "Done," or "OK." Your TV will attempt to connect to your Wi-Fi network. 10. Test the Connection: If the connection is successful, you'll usually see a confirmation message. It's a good practice to test the connection by opening a streaming app or browsing the web on your TV to ensure everything is working correctly.
Brand-Specific Guides
Samsung TVs
On most Samsung smart TVs, you'll press the "Home" button on your remote. Navigate to "Settings" (often represented by a gear icon). Then, select "General" > "Network" > "Open Network Settings." Choose "Wireless" as the connection type. Your TV will scan for networks. Select your SSID and enter your password. Samsung TVs typically use an on-screen keyboard for password entry. Once connected, you'll see a confirmation message.
LG TVs
For LG smart TVs, press the "Settings" button on your remote, then select the "All Settings" option. Navigate to "Network" > "Wi-Fi Connection." Your TV will display a list of available networks. Select your SSID, enter your password using the on-screen keyboard, and confirm. LG TVs often have a "Connect" button to finalize the process.
Sony TVs (Android TV / Google TV)
Sony TVs running Android TV or Google TV have a similar interface. Press the "Home" button on your remote. Navigate to "Settings" (gear icon). Select "Network & Internet" > "Network." Choose "Wi-Fi." Your TV will list available networks. Select your SSID, enter your password, and select "Connect."
TCL Roku TVs
TCL Roku TVs have a distinct interface. Press the "Home" button on your remote. Navigate to "Settings" > "Network" > "Set up connection." Choose "Wireless." Your TV will scan for networks. Select your SSID, enter your password, and select "Connect." Roku TVs are known for their user-friendly setup process.
Other Brands (Hisense, Vizio, etc.)
While menus may differ, the core steps remain consistent. Look for "Settings," "Network," or "Internet" options. Select "Wireless" or "Wi-Fi," choose your network, and enter your password. Always refer to your TV's specific user manual if you encounter difficulties.
Verifying Connection and Internet Access
Once your TV indicates a successful connection, it's crucial to verify that it can indeed access the internet. The most reliable way to do this is to launch a built-in application that requires an internet connection, such as YouTube, Netflix, or the TV's web browser. If these applications load and function correctly, your TV is successfully connected to the internet. Some TVs also have a dedicated "Network Status" or "Internet Test" option within the network settings menu. This feature can diagnose potential issues and confirm the speed and reliability of your connection. In 2025, with the increasing demand for high-bandwidth content, ensuring a stable internet connection is as important as the initial Wi-Fi connection itself.
Connecting Non-Smart TVs to Wi-Fi
If you have a traditional, non-smart television that lacks built-in Wi-Fi capabilities, don't worry – you can still unlock the world of online streaming and smart features. The solution involves using external devices that act as bridges between your TV and your Wi-Fi network. These devices essentially turn your "dumb" TV into a smart TV, offering access to apps, streaming services, and internet browsing. The primary advantage of this approach is cost-effectiveness; it's often much cheaper to buy a streaming device than to replace an entire television.
Using Streaming Devices
Streaming devices are small, plug-and-play gadgets that connect to your TV's HDMI port and your home Wi-Fi network. They come with their own operating systems and user interfaces, providing access to a wide range of streaming apps. Some of the most popular streaming devices available in 2025 include:
1. Amazon Fire TV Stick: This popular device plugs directly into an HDMI port. It connects to your Wi-Fi and provides access to the Amazon Appstore, allowing you to download apps like Netflix, Hulu, Prime Video, Disney+, and more. It comes with a voice-controlled remote, often featuring Alexa integration, which simplifies navigation and content searching.
2. Google Chromecast with Google TV: Google's latest Chromecast model integrates Google TV, offering a more comprehensive smart TV experience than previous versions. It connects to your Wi-Fi and allows you to stream content from numerous apps. You can also cast content from your smartphone or tablet directly to the TV using Chromecast functionality.
3. Roku Streaming Stick/Box: Roku is renowned for its simple interface and extensive app selection (called "channels"). Roku devices connect to your Wi-Fi and offer access to thousands of streaming services. They come in various forms, including compact sticks that plug into the HDMI port and small boxes that connect via an HDMI cable.
4. Apple TV: While often more expensive, Apple TV offers a premium streaming experience with a sleek interface, excellent performance, and seamless integration with the Apple ecosystem. It connects to your Wi-Fi and provides access to the App Store, Apple TV+, and other Apple services.
Setup Process for Streaming Devices
The setup process for most streaming devices is remarkably similar:
- Connect the Device: Plug the streaming device into an available HDMI port on your TV. If it's a stick, it might draw power directly from the TV's USB port, or you might need to use the included power adapter and plug it into a wall outlet.
- Power On and Select Input: Turn on your TV and use your TV remote to select the correct HDMI input source that corresponds to the port you used.
- Initial On-Screen Setup: The streaming device will guide you through an initial setup process on your TV screen. This usually involves selecting your language and region.
- Connect to Wi-Fi: You'll be prompted to connect the streaming device to your home Wi-Fi network. Select your SSID from the list and enter your Wi-Fi password using the on-screen keyboard provided by the streaming device.
- Log In or Create an Account: You'll likely need to log in with an existing account (e.g., Amazon, Google, Apple) or create a new one to access the device's app store and services.
- Download Apps: Once connected and logged in, you can browse and download your preferred streaming apps from the device's app store.
- Start Streaming: After downloading your apps, you can sign in to your streaming service accounts and begin watching content.
The user interface and navigation will be handled by the streaming device's remote control, not your TV's original remote (though some universal remotes can control both).
Using Gaming Consoles
Modern gaming consoles like the PlayStation 5 and Xbox Series X/S are essentially powerful mini-computers that also connect to the internet via Wi-Fi. If you own one of these consoles, you already have a device capable of accessing streaming apps and browsing the web. The setup process is similar to other streaming devices: connect the console to your TV via HDMI, power it on, and navigate through the console's network settings to connect to your Wi-Fi. Once connected, you can download and use streaming apps like Netflix, YouTube, and others directly from the console's app store or media hub. This is a convenient option if you already have a gaming console and don't want to purchase a separate streaming device.
Using Blu-ray Players with Smart Features
Some Blu-ray players, particularly those released in the last decade, come with built-in smart capabilities. These "smart Blu-ray players" can connect to your Wi-Fi network and offer access to a selection of streaming apps, similar to dedicated streaming devices. If you have a smart Blu-ray player, you can connect it by navigating to its network settings, selecting your Wi-Fi network, and entering your password. While the app selection on these players might be more limited compared to dedicated streaming devices, they can be a good option if you primarily use your TV for watching physical media and occasionally want to stream content.
Troubleshooting Common Wi-Fi Connection Issues
Even with the most straightforward setup, you might encounter issues when trying to connect your TV to Wi-Fi. Fortunately, most common problems have straightforward solutions. This section will guide you through diagnosing and resolving these issues, ensuring you can get back to enjoying your connected TV experience.
TV Cannot Find Wi-Fi Network
Possible Causes:
- The Wi-Fi network is out of range.
- The router is not broadcasting its SSID.
- There's interference from other devices.
- The TV's Wi-Fi adapter has a temporary glitch.
- Check Router Placement: Ensure your TV is within the effective range of your Wi-Fi router. Try moving the router closer to the TV or vice versa, or consider a Wi-Fi extender.
- Verify SSID Broadcasting: Log into your router's settings and ensure that the SSID broadcast is enabled. If it's hidden, you'll need to manually enter the SSID on your TV.
- Restart Router and TV: Power cycle both your router and your TV. Unplug them from the power outlet, wait 30 seconds, and plug them back in.
- Check for Interference: Move the TV and router away from other electronic devices that might cause interference, such as microwaves, cordless phones, or Bluetooth devices.
- Update TV Firmware: If possible, connect your TV via an Ethernet cable temporarily to check for and install any available firmware updates.
Incorrect Password Error
Possible Causes:
- The password was typed incorrectly.
- The password has been changed on the router.
- The TV is trying to connect to the wrong network.
- Re-enter Password Carefully: Double-check that you are entering the Wi-Fi password exactly as it is, paying close attention to case sensitivity, numbers, and symbols. Use the on-screen keyboard carefully.
- Verify Password: Confirm the current Wi-Fi password with your router's settings or by checking another device that is successfully connected.
- Forget Network and Reconnect: On your TV's network settings, find the option to "Forget" or "Delete" your Wi-Fi network. Then, scan for networks again and re-enter the password.
TV Connects but No Internet
Possible Causes:
- The router is connected to the internet, but there's an issue with the TV's IP address assignment.
- Your internet service is down.
- There's a problem with your ISP.
- DNS issues.
- Check Internet Connection on Other Devices: Verify that other devices (smartphones, computers) in your home can access the internet. If not, the issue lies with your internet service.
- Restart Modem and Router: Perform a full power cycle of your modem and router.
- DHCP Enabled: Ensure that DHCP (Dynamic Host Configuration Protocol) is enabled on your router. This allows the router to automatically assign an IP address to your TV. You can usually check this in your router's settings.
- Static IP Configuration (Advanced): As a last resort, you can try manually configuring a static IP address, subnet mask, gateway, and DNS server within your TV's network settings. This requires knowledge of your network configuration.
- Contact ISP: If multiple devices cannot connect to the internet, contact your Internet Service Provider.
Slow Internet Speed on TV
Possible Causes:
- Weak Wi-Fi signal strength.
- Network congestion (too many devices using the internet).
- Your internet plan's bandwidth is insufficient.
- Outdated router or TV Wi-Fi adapter.
- Background downloads or updates on the TV.
- Improve Signal Strength: Move the router closer to the TV, or use a Wi-Fi extender or mesh system.
- Reduce Network Load: Temporarily disconnect other devices from your Wi-Fi network to see if performance improves.
- Upgrade Internet Plan: If your internet speed is consistently low across all devices, consider upgrading your plan with your ISP.
- Use 5GHz Band: If your router and TV support it, connect to the 5GHz Wi-Fi band for potentially faster speeds and less interference.
- Check for Updates: Ensure your TV's firmware and your router's firmware are up to date.
- Wired Connection: For the most stable and fastest speeds, consider connecting your TV to the router using an Ethernet cable.
Intermittent Disconnections
Possible Causes:
- Weak or unstable Wi-Fi signal.
- Interference from other devices.
- Router issues.
- TV's Wi-Fi adapter problems.
- Strengthen Signal: As mentioned above, improve signal strength by repositioning the router or using extenders.
- Reduce Interference: Identify and mitigate sources of wireless interference.
- Update Router Firmware: Ensure your router's firmware is current.
- Factory Reset TV: As a more drastic step, you can perform a factory reset on your TV and set up the Wi-Fi connection again from scratch.
- Contact Manufacturer Support: If the problem persists, there might be a hardware issue with your TV's Wi-Fi adapter, and you may need to contact the manufacturer for support or repair.
Advanced Tips for a Stable Wi-Fi Connection
Once you've successfully connected your TV to Wi-Fi, there are several advanced tips and optimization strategies you can employ to ensure a consistently stable, fast, and reliable connection. These go beyond the basic setup and troubleshooting, focusing on maximizing performance and minimizing potential disruptions, especially crucial for high-definition streaming and online gaming in 2025.
Optimize Router Placement and Settings
The physical location of your router is paramount. Place it in a central location in your home, elevated and away from obstructions like thick walls, metal objects, and large appliances. Avoid placing it near other electronic devices that emit radio frequencies, such as microwaves, cordless phones, and Bluetooth speakers, as these can cause interference. If your router is dual-band (2.4GHz and 5GHz), consider assigning your TV to the 5GHz band if it's within a reasonable range. The 5GHz band offers faster speeds and less interference but has a shorter range than 2.4GHz. For devices like TVs that are relatively stationary, dedicating the 5GHz band can provide a significant performance boost. Also, ensure your router's firmware is regularly updated. Manufacturers release updates to improve performance, security, and compatibility. Many routers allow for automatic firmware updates, which is the most convenient option.
Consider Wi-Fi Extenders or Mesh Systems
If your TV is located far from your router, or if your home has dead spots where the Wi-Fi signal is weak, a Wi-Fi extender or a mesh Wi-Fi system can be invaluable. A Wi-Fi extender (also known as a repeater) picks up your existing Wi-Fi signal and rebroadcasts it, effectively extending the network's range. However, extenders can sometimes halve the available bandwidth. A mesh Wi-Fi system is a more advanced solution that uses multiple nodes placed strategically throughout your home to create a single, seamless Wi-Fi network. This provides consistent coverage and speeds without the bandwidth reduction associated with traditional extenders. For larger homes or those with challenging layouts, a mesh system is often the superior choice for ensuring robust Wi-Fi coverage for all devices, including your TV.
Prioritize Traffic with QoS
Quality of Service (QoS) is a feature found on many modern routers that allows you to prioritize certain types of network traffic or specific devices. If you experience buffering or lag when streaming or gaming on your TV, you can use QoS settings to give your TV's network traffic higher priority over less critical activities, such as background downloads. This ensures that your TV receives sufficient bandwidth and a stable connection, even when other devices on your network are heavily utilizing the internet. Configuring QoS typically involves logging into your router's administrative interface and assigning priority levels based on device or application. By 2025, with the proliferation of high-bandwidth applications, QoS is becoming an essential tool for home network management.
Use Ethernet Cable When Possible
While this guide focuses on Wi-Fi, it's crucial to reiterate that a wired Ethernet connection is almost always superior in terms of speed, stability, and reliability. If your TV is located near your router and running an Ethernet cable is feasible (even if it requires some minor cable management), this is the most effective way to guarantee the best possible connection. Ethernet connections are not susceptible to wireless interference or signal degradation, making them ideal for critical applications like 4K HDR streaming, online gaming, and large file downloads. Many modern TVs have an Ethernet port, and the setup is as simple as plugging in the cable.
Secure Your Network
A secure Wi-Fi network is not only important for protecting your personal data but also for maintaining network performance. Weak security can lead to unauthorized users accessing your network, consuming bandwidth, and potentially slowing down your connection. Ensure your router is using WPA2 or WPA3 encryption, and use a strong, unique password. Regularly review the list of connected devices on your router's administrative interface and disconnect any unfamiliar devices. By keeping your network secure, you ensure that the bandwidth is available for your intended use, contributing to a more stable experience for your TV and all other connected devices.
Consider DNS Settings
The Domain Name System (DNS) server translates website names (like google.com) into IP addresses that computers and devices use to connect. Your ISP typically assigns a DNS server by default, but sometimes these servers can be slow or unreliable, affecting browsing speeds and content loading times. You can often improve performance by switching to a public DNS service like Google DNS (8.8.8.8 and 8.8.4.4) or Cloudflare DNS (1.1.1.1 and 1.0.0.1). These services are often faster and more reliable. You can change your DNS settings either on your router (which will apply the change to all connected devices) or directly within your TV's network settings, if supported. This can sometimes lead to a noticeable improvement in how quickly web pages and streaming app content load.
Conclusion
Connecting your TV to Wi-Fi is a fundamental step in modern home entertainment, unlocking a universe of streaming, apps, and interactive features. Whether you're setting up a new smart TV or upgrading an older model with a streaming device, the process is designed to be accessible. By understanding your network credentials, following the step-by-step guides tailored to your TV brand, and knowing how to troubleshoot common issues, you can ensure a smooth and enjoyable connection. Remember that a stable internet connection and a well-configured router are key to maximizing your TV's potential. Prioritize a strong Wi-Fi signal, consider advanced optimizations like QoS or mesh systems if needed, and always opt for a wired Ethernet connection when possible for the ultimate in performance and reliability. Embrace the connected future and enjoy an expanded world of entertainment right from your living room.